Brake Light Kit Installation
GENERAL INFORMATION
The whole process takes 10-20 minutes.
It’s perfectly feasible to do alone.
Aa second pair of hands is helpful especially for beginners.
REQUIREMENTS
- the Brake Light Lowering Kit
- Flat head screwdriver
- power drill
- drill bit ~10mm (slightly smaller also works)
- wrench
- knife / pliers
Hatrest Removal
From the trunk, unplug the third brake light plug.
Fold the rear seats down and sit on the folded-down rear seat.
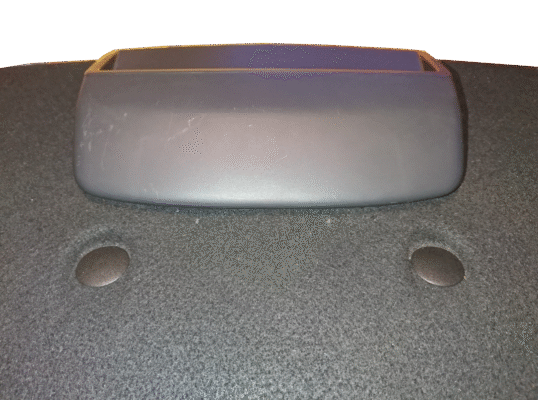
Firstly, grab onto the upper part of the brake light and pull it towards you. It should pop right off the lower half. This facilitates the removal of the rest.
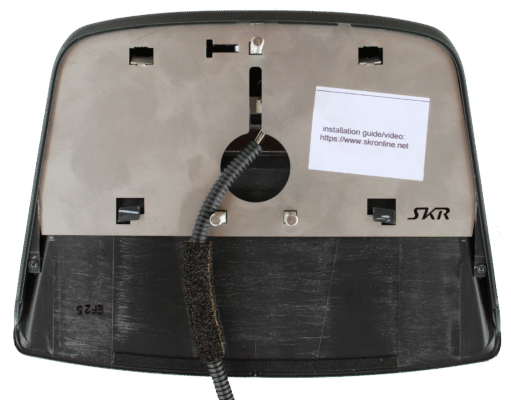
You can see four plastic pins facing you at the bottom of the hatrest. Remove these with a screwdriver or tool.
Hatrest modifications
Turn the hatrest bottoms-up.
The light’s bottom part is welded to the hatrest in various places. Those welds have to be drilled open. A 10mm drill bit works best; some cleanup of residue will be required. Drilling them out is very easy so little force is required.
I the light didn’t come clean off, pull gently. Discard the brake light bottom and deburr the bracket on the underside of the hatrest if required. If this (glued) bracket became a little loose it may be worth reapplying some glue.
The supplied CHRISTMAS TREE CLIPS now go into the front-facing and furthest outside holes. They should fit as-is, however the supplied SMALL WASHERS should be used to make sure. Push these washers down in a wiggly pattern, going one side then another until there is no more room. In the picture pliers are used, however two fingers would theoretically suffice.
The CHRISTMAS TREE CLIPS now need to be shortened with a knife or cutter. Skipping this step may lead to pressure between the car chassis and trim
Brake Light Modification
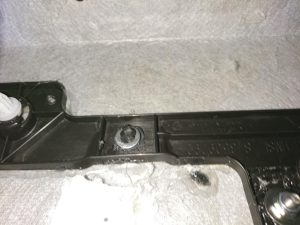
Put the SCREWS through the METAL PLATE starting with the single one one top.
This one comes with a retention clip (optional) that can be used to keep the screw from falling out during installation.
ATTENTION: Make sure not to extert too much force on the plate overall to prevent bending it.
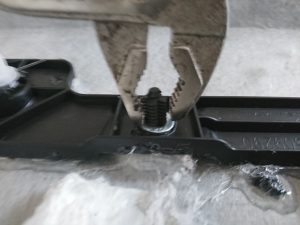
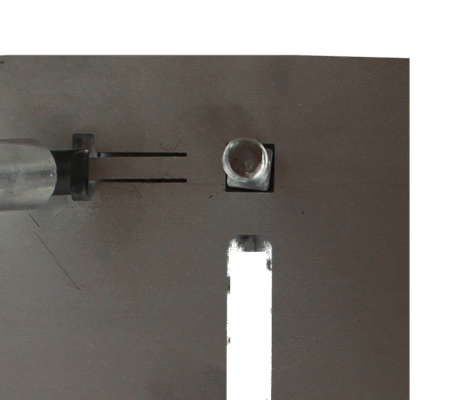
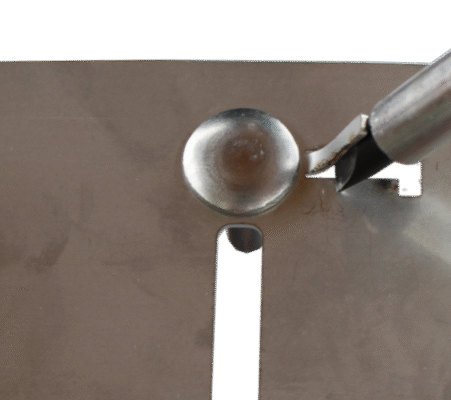
Insert the screw into the square slot (side doesn’t matter), then bend the retention clip around as per the pictures:
(1) push the retention clip out with your screwdriver
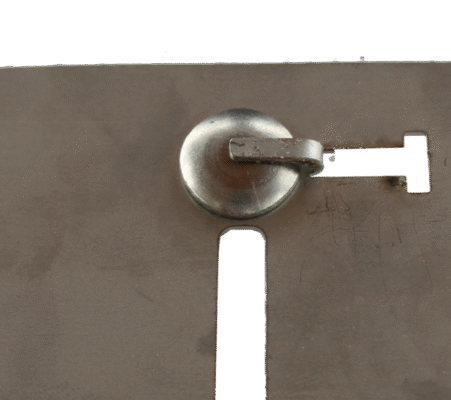
(2) turn plate over and pry the retention clip up until it’s rougly perpendicular
(3) using pliers or a flat surface, bend the clip down close enough to the screw head that it can’t slip out on its own
The other two screws can be manually retained while flipping over the METAL BRACKET.
Ready the top half of the brake light.
Grab the threaded ends of the paired SCREWS in one hand and flip the METAL BRACKET over.
Get the brake light cable through the cutout in the METAL BRACKET and place it on top of the brake light as pictured, about 2cm from the front- facing side.
Then first push METAL BRACKET into/underneath the little overhangs on each side of the plastic cover. The paired screws should aleady sit well without assist.
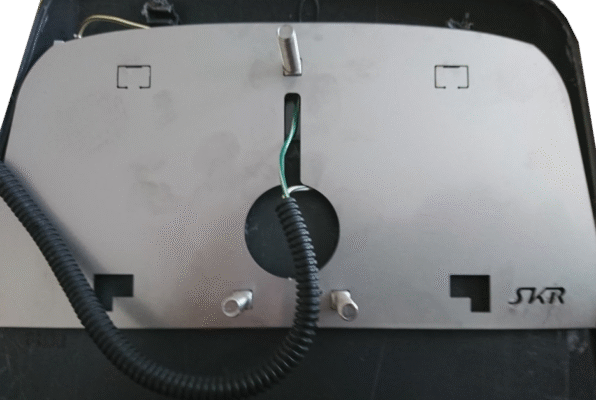
Push the bracket “up” in the picture, towards the front facing portion of the brake light. Everything should slide right in. Make sure the little plastic wedges go through and interlock with the METAL PLATE as pictured.
Confirm the cable isn’t being squeezed or wedged in any way.
Put the flathead screwdriver into the little cutout “window”and bend it down by approximately 60 degrees.
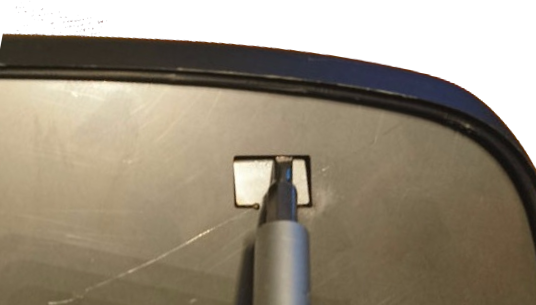
This is how things should look like when all is done.
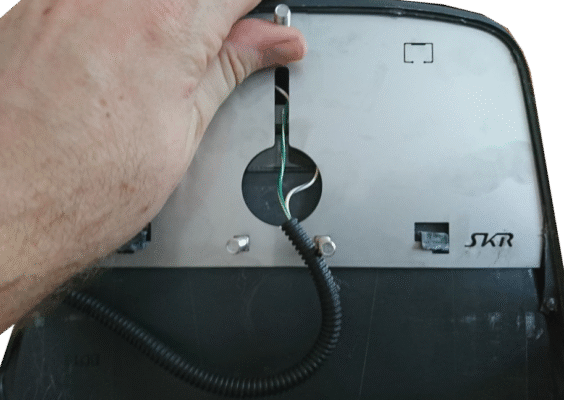
The upper part of the brake light is now rigidly socketed and can be remounted onto the headrest by first pulling the cable through the big center hole in the trim and then the SCREWS through the leftover holes.
Use the LARGE WASHERS and NUTS to tighten. Best start with the center SCREW
Make sure not to use too much force: slightly warping the METAL PLATE is desireable, however, to create some tension.
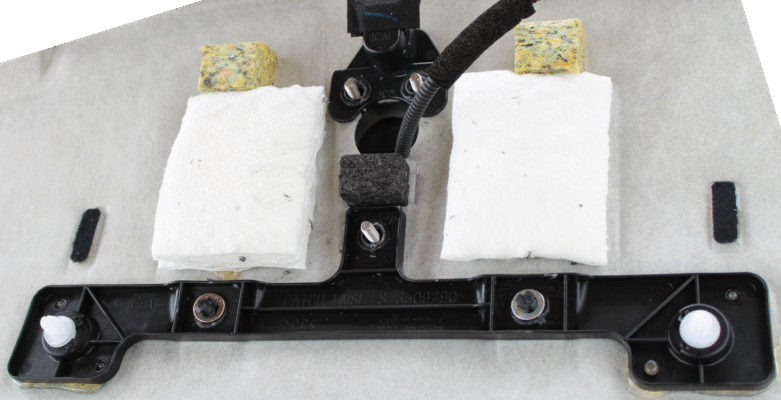
This is how the assembled solution should look. Precise symmetry alignment with the trim can now be done (as well as in the car).
The paired SCREWS pushing the brake light housing upwards a bit is actually desireable.
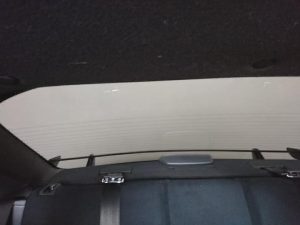
Afterwards, the hatrest can be reinstalled in reverse order, the light plugged back in.
Done!
No liability can be taken in case something goes wrong or gets damaged.